

Loud computer fan noise is a common issue many users encounter, not only affecting the user experience but also potentially indicating hidden problems such as cooling issues with the computer. Below are 10 practical tips to help you quickly reduce fan noise.
Dust accumulation is one of the most common causes of loud computer fan noise. Dust adheres to fan blades and cooling vents, increasing the resistance to fan rotation and thus generating more noise.
Prepare tools such as a screwdriver, compressed air canister, and soft brush.
Shut down the computer and unplug the power cord (for laptops, remove the battery as well).
Open the computer case (for desktops) or remove the back cover of the laptop.
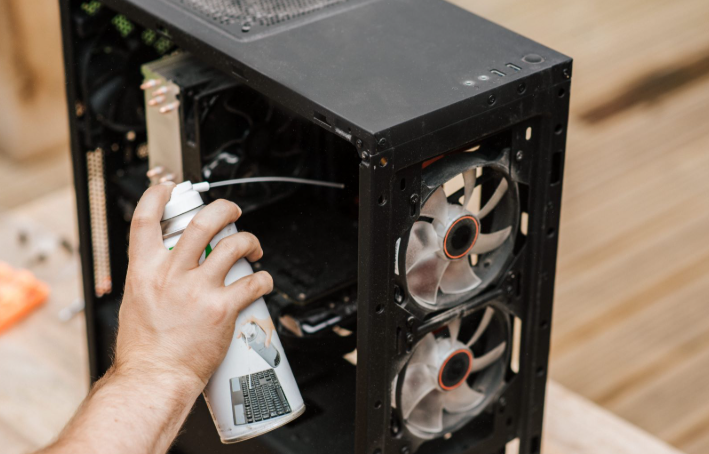
Gently brush off the dust from the fan blades and cooling vents with the soft brush.
Use the compressed air canister to blow away residual dust from the opposite direction of the vents, paying attention to controlling the air pressure to avoid damaging the fan blades.
After cleaning, reinstall the case or back cover, reconnect the power, and turn on the computer.
A poorly installed fan or loose screws after long-term use can cause vibrations during rotation, leading to increased noise.
Open the computer case or remove the laptop's back cover to locate the fan.
Gently shake the fan to check for any looseness.
If loose screws are found, tighten them with a screwdriver, but do not over-tighten to avoid damaging the screws or the fan base.
After turning on the computer, observe if the fan rotates stably and if the noise decreases.
The fan bearing may lack lubrication after long-term use, causing increased friction during rotation and generating noise.
Locate the fan bearing, typically under a circular sticker at the center of the fan.
Carefully peel off the sticker to expose the bearing.
Dip a toothpick or needle into a small amount of light lubricating oil (such as sewing machine oil) and apply it to the bearing. Be careful not to use too much to prevent the oil from overflowing and contaminating other components.
Gently rotate the fan blades to evenly distribute the lubricant.
Reapply the sticker and reinstall the fan.
Test after turning on the computer; the noise should decrease.
Excessively high fan speed leads to increased noise, and in many cases, fan speed can be adjusted via software or BIOS.
Adjust via BIOS (for desktops):
Press Delete or F2 (or other keys as specified in the computer manual) during startup to enter BIOS settings.
Find options like "PC Health Status" or "System Monitor" in the BIOS.
Locate the fan speed setting, typically "CPU Fan Speed Control" or "Chassis Fan Speed Control".
Adjust the fan speed to "Auto" or set an appropriate speed according to actual conditions, avoiding excessively high settings.
Save the settings and exit the BIOS.
Adjust via Software (for desktops and laptops):
Download and install fan speed control software, such as SpeedFan or HWMonitor.
Run the software, which will automatically detect the computer's fan speed and temperature.
Manually adjust the fan speed curve based on temperature, so the fan runs at a lower speed when temperatures are low and increases speed appropriately when temperatures rise.
Thermal paste serves to fill the gap between the CPU and the cooler, improving heat dissipation efficiency. If the thermal paste dries out or ages, it will reduce heat dissipation, causing the CPU temperature to rise and the fan to increase speed for cooling, thus generating more noise.
Shut down the computer and disconnect the power, then open the case or remove the laptop's back cover.
Locate the CPU cooler, unscrew the fixing screws, and carefully remove the cooler.
Gently wipe off the old thermal paste from the CPU surface and the cooler base with a tissue or cotton swab.
Take an appropriate amount of new thermal paste and apply it evenly to the CPU surface (note: do not apply too much; a thin layer is sufficient).
Reinstall the cooler in its original position and tighten the screws.
Reinstall the case or back cover, and after turning on the computer, observe if the CPU temperature drops and the fan speed decreases.
Overheating hardware causes fans to run at high speeds for cooling, resulting in noise. Therefore, checking hardware temperatures and resolving overheating issues is an important measure to reduce fan noise.
Download and install hardware temperature monitoring software, such as Core Temp or AIDA64.
Run the software to monitor the temperatures of hardware like the CPU, graphics card, and hard drive.
If any hardware is found to be overheating, analyze the cause and solve it:
CPU overheating: May be due to thermal paste issues, excessive dust on the cooler, or insufficient cooler performance. Refer to the above methods for replacing thermal paste and cleaning dust, or replace with a more efficient cooler.
Graphics card overheating: Check if the graphics card fan is running normally, clean dust from the graphics card cooler, or add a case cooling fan.
Hard drive overheating: For mechanical hard drives, install them in a well-ventilated position in the case; for solid-state drives, temperatures are generally low, and if overheating occurs, it may be a quality issue, requiring contact with after-sales service.
A slow-running system or too many background programs can cause high CPU load, increased temperature, faster fan speed, and noise.
Close unnecessary background programs: Press Ctrl+Shift+Esc to open Task Manager, and end unnecessary programs in the "Processes" tab.
Clean system junk: Use disk cleanup tools (Windows built-in disk cleanup or third-party cleanup software) to remove system caches, temporary files, and other junk files.
Optimize startup items: In the "Startup" tab of Task Manager, disable unnecessary startup programs to reduce the load when the computer boots.
Update the system and drivers: Timely update the operating system and hardware drivers to fix potential bugs and compatibility issues, improving system stability and performance.
Avoid running too many large programs: If not necessary, try not to run multiple high-load programs simultaneously, such as large games or video editing software.
Poor heat dissipation inside the case leads to increased hardware temperatures and high fan speeds, generating noise. Improving the case cooling environment can effectively reduce fan speed and noise.
Organize cables inside the case: Messy cables hinder air circulation and affect heat dissipation. Bundle cables neatly to prevent them from winding around fans or coolers.
Add case cooling fans: Install cooling fans in appropriate positions according to the case structure to form a good cooling airflow path. Generally, install intake fans at the front of the case and exhaust fans at the rear to form an airflow from front to rear.
Ensure good case ventilation: Do not place the case in an enclosed space or near walls, corners, or other poorly ventilated areas. Keep sufficient space around the case for air circulation.
For laptops, use a cooling pad: The cooling pad helps dissipate heat from the laptop through bottom fans, reducing internal temperatures and thus decreasing fan noise.
If the above methods do not effectively reduce fan noise, it may be due to poor fan quality or severe aging. In this case, consider replacing it with a quiet fan.
Fan size: Choose a suitable size according to the case or cooler specifications. Common desktop fan sizes include 8cm, 12cm, etc. Laptop fans are generally model-specific, so purchase based on the laptop model.
Bearing type: Quiet fans typically use low-noise bearings such as hydraulic bearings or magnetic levitation bearings, which produce lower noise and have a longer lifespan compared to traditional ball bearings.
Speed and airflow: Choose a fan with a lower speed under the premise of meeting cooling needs. Generally, lower speed means lower noise. Meanwhile, pay attention to the fan's airflow to ensure sufficient cooling capacity.
Brand and reputation: Choose quiet fans from well-known brands for more guaranteed quality and after-sales service.
If you are not familiar with computer hardware or the noise issue persists after trying the above methods, it is recommended to seek help from professional computer maintenance personnel. Professionals can more accurately determine the source of the noise and take appropriate solutions to avoid damaging computer hardware due to improper personal operation.
In summary, the problem of loud computer fan noise can be gradually solved through the above 10 tips. During daily computer use, regular cleaning and maintenance, as well as paying attention to the computer's cooling and operating environment, can effectively prevent loud fan noise and extend the computer's service life.
The above introduces 10 tips for reducing computer fan noise. Please check if these methods meet your needs. If you have other questions or special circumstances, feel free to let me know at any time.

