

If you’re building a PC, upgrading your CPU, or reapplying thermal paste for better heat transfer, knowing how to properly remove old thermal paste from your CPU is a crucial skill. Thermal paste can dry out over time, become less effective, or get contaminated, so cleaning it off correctly ensures your new paste works as intended—and protects your CPU from damage. Let’s break down the tools you’ll need and the step-by-step process to get the job done safely and easily.
Before you start, gather these simple tools. Most are easy to find around the house or at electronics stores:
Isopropyl Alcohol (90% or higher): This is the star of the show. High-concentration isopropyl alcohol dissolves thermal paste quickly and evaporates completely, leaving no residue. Avoid lower concentrations (like 70%) because they contain more water, which can take longer to dry and might damage components.
Microfiber Cloths or Lint-Free Wipes: Regular paper towels can leave tiny fibers on the CPU’s surface, which interfere with thermal paste adhesion. Microfiber cloths or lint-free wipes (like those used for cleaning glasses or camera lenses) are soft and won’t scratch the CPU.
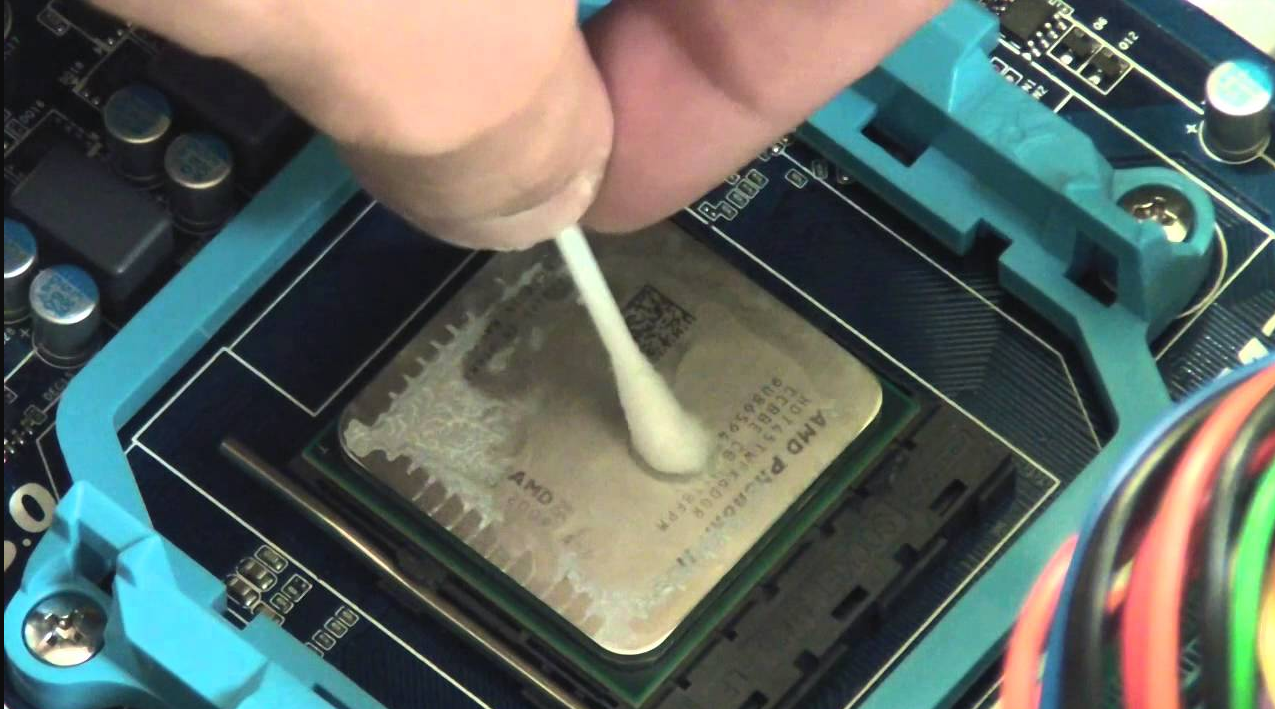
Cotton Swabs (Q-Tips): These are perfect for reaching small crevices, like around the CPU’s edges or near the pins (if you’re dealing with a socketed CPU).
Anti-Static Wristband (Optional but Recommended): Static electricity can fry sensitive CPU components. An anti-static wristband grounds you, reducing this risk. If you don’t have one, touch a metal part of your PC case (unplugged) before handling the CPU to discharge static.
Plastic Spudger or Credit Card (for Stubborn Paste): If the thermal paste is dried and hard, a soft plastic tool (like a spudger or an old credit card) can gently lift it without scratching the CPU. Never use metal tools—they can damage the delicate CPU surface.
Follow these steps carefully to avoid damaging your CPU. Always start with your PC unplugged to prevent electric shock or component damage.
Power down your PC and unplug the power cord.
Open your PC case. Locate the CPU cooler (usually a fan with a heatsink) on top of the CPU.
Remove the cooler: This may involve unscrewing bolts, flipping plastic clips, or disconnecting a power cable (check your cooler’s manual if unsure).
Once the cooler is off, gently lift the CPU from its socket. Most sockets have a lever—lift it to release the CPU, then pull the CPU straight up.
Place the CPU on a clean, flat surface (like a desk) covered with a soft cloth or anti-static mat. Avoid surfaces that generate static, like carpets.
Lay out your tools: alcohol, microfiber cloths, cotton swabs, etc., within easy reach.
If the thermal paste is fresh (not dried), skip to Step 4. For dried or hardened paste:
Dampen a corner of a microfiber cloth with isopropyl alcohol.
Gently press the damp cloth against the paste for 10–15 seconds. This softens the paste, making it easier to wipe away.
Fold a microfiber cloth into a small square. Apply a few drops of isopropyl alcohol to one corner.
Hold the CPU by its edges (never touch the gold pins or the top surface, as oils from your fingers can contaminate it).
Gently wipe the top surface of the CPU in a circular or back-and-forth motion. The alcohol will dissolve the paste, and the cloth will pick it up.
Flip the cloth to a clean section as it gets dirty to avoid smearing paste back onto the CPU.
For leftover paste in crevices (like around the CPU’s edges) or near the pins (on socketed CPUs):
Dip a cotton swab in isopropyl alcohol (don’t soak it—you don’t want excess liquid dripping).
Gently dab or swipe the swab over the remaining paste. Be extra careful near the pins—too much pressure can bend them.
Use a new swab for each area to avoid spreading paste.
Once most of the paste is gone, take a clean microfiber cloth and dampen it slightly with alcohol.
Do a final wipe over the entire CPU surface to remove any remaining residue.
Let the CPU air-dry completely (this takes 1–2 minutes, thanks to the alcohol’s quick evaporation). Never use a hairdryer or heat source—this can damage the CPU.
Check the CPU surface under good lighting. It should look smooth and free of paste, lint, or smudges.
If you see any leftover residue, repeat Steps 4–6 with a fresh cloth or swab.
Don’t rush: Taking your time reduces the risk of scratches or bent pins.
Avoid water: Water can leave mineral deposits or cause corrosion. Stick to isopropyl alcohol.
Handle with care: The CPU is one of the most expensive parts of your PC—always hold it by the edges.
By following these steps, you’ll have a clean CPU ready for fresh thermal paste. A properly cleaned surface ensures better heat transfer between the CPU and cooler, keeping your PC running cool and efficient. Happy building!

