

Keyboards are workhorses of our digital lives, but they’re also magnets for dust, crumbs, and grime. Over time, this buildup can affect performance, harbor bacteria, and even cause keys to stick. Regular cleaning not only keeps your keyboard looking fresh but also extends its lifespan. Here’s a step-by-step guide to help you achieve a thoroughly clean keyboard, with critical steps highlighted for extra attention.

Before diving into cleaning, power off your device and disconnect the keyboard (if it’s a wired model). For laptops, shut down the entire device and unplug it from the charger. This prevents electrical damage and avoids accidental key presses during cleaning. Next, gather your supplies: a can of compressed air, microfiber cloths, cotton swabs, isopropyl alcohol (70% or higher), a soft-bristled brush (like a toothbrush with gentle bristles), and a small vacuum attachment (optional). Avoid using harsh chemicals, paper towels, or abrasive materials—these can scratch surfaces or damage key mechanisms.
Start by dislodging visible crumbs, dust, and hair. Tilt the keyboard at a 45-degree angle and gently shake it over a trash bin to release larger particles. For hard-to-reach areas between keys, use compressed air: hold the can upright (to avoid liquid spray) and blast short bursts between the key gaps. This dislodges stubborn dust and debris that shaking alone might miss. If you have a small vacuum with a brush attachment, use it on low power to suck up remaining loose particles—this is especially useful for keyboards in dusty environments.
For surface grime and sticky residues, dampen a microfiber cloth with a small amount of isopropyl alcohol (don’t soak it). Wipe the tops of the keycaps in a circular motion, focusing on areas with visible fingerprints or spills. For tight spaces around keys, use cotton swabs dipped in alcohol—twist them gently to avoid leaving fibers behind. If your keyboard has removable keycaps (common in mechanical models), you can pop them off with a keycap puller (or a paperclip bent into a U-shape) for deeper cleaning. Soak the keycaps in warm, soapy water for 10–15 minutes, then rinse and let them air-dry completely before reattaching.
If certain keys feel sticky or don’t register properly, the issue might be debris under the key mechanism. After removing the keycap (if possible), use a cotton swab dampened with alcohol to clean the switch or membrane underneath. Be gentle—applying too much pressure could damage the components. For non-removable keys (like those on most laptops), press the key down slightly and run a dry brush or compressed air along the edges to dislodge trapped dirt. Let the alcohol evaporate completely (usually 5–10 minutes) before testing the key.
Keyboards are known to harbor more bacteria than toilet seats, so disinfection is a crucial step, especially if multiple people use the device. Use a disinfectant wipe (or a microfiber cloth sprayed with a keyboard-safe disinfectant) to wipe down all surfaces, including the keycaps and the area around the keyboard. Avoid saturating the keyboard—excess liquid can seep into internal components. Let the surface dry entirely before reconnecting or powering on the device.
Wash your hands before using the keyboard to reduce oil and dirt transfer.
Avoid eating or drinking near the keyboard to prevent crumbs and spills.
Use a keyboard cover (for laptops or desktop models) when not in use to protect against dust.
Perform light cleanings weekly (using compressed air and a dry cloth) to prevent buildup, and deep clean monthly for heavy use.
By following these steps, you can keep your keyboard in top condition—clean, functional, and hygienic. A little regular care goes a long way in ensuring your keyboard serves you well for years to come.
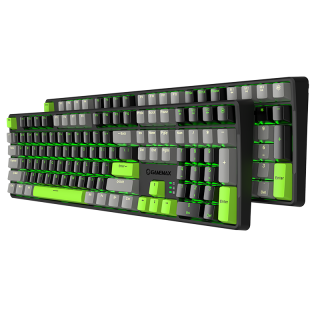
The keycap adopts a two-color injection molding process, which is durable and durable, and is not easy to fade, X1 model Black/Gray and X2 Gray/Black color combination
• Sensitive key response, trigger stroke 2.0mm
• durable and excellent handle
• Adopt mechanical green shaft switch design, with 60 million times of key life
• Support 6-key and N-key mode selection, and the Num Pad function is not affected
• Intelligent sleep mode, The backlight is off once the PC standby and resumes the previous mode after starting
• PBT key cap, gap backlight, uniform color
• The humanized design of the keyboard adds a series of common shortcut function keys in cooperation with Fn
• Dual mode (game mode) and (office mode) can be switched freely according to personal needs
• Independent 4 multimedia keys
• Independent 3 indicators: NUM, CAP, WIN (lock WIN) indicator

