

In the realm of DIY PC building, vertical GPU installation has emerged as a popular choice among enthusiasts. This mounting method not only showcases your graphics card in a stunning, eye-catching orientation but also enhances cooling performance and reduces stress on the PCIe slot from heavy GPU sag. However, achieving a safe, stable, and aesthetically pleasing vertical GPU setup requires several key accessories. In this article, we’ll break down the must-have components and highlight an exceptional support solution: the GameMax GPU-192 BK.
Aesthetic Upgrade: Vertical placement fully displays the GPU’s RGB lighting, metallic backplate, and design, making it perfect for side-panel tempered glass cases to create a personalized build.
Cooling Optimization: By minimizing heat accumulation between the GPU and motherboard, vertical installation can lower GPU temperatures by 3–5°C when paired with proper case airflow, extending hardware lifespan.
Slot Protection: Prevents PCIe slot bending or poor contact caused by gravity, a critical benefit for large, high-end 非公显卡 (non-reference designs like RTX 4090 or RX 7900 XT).
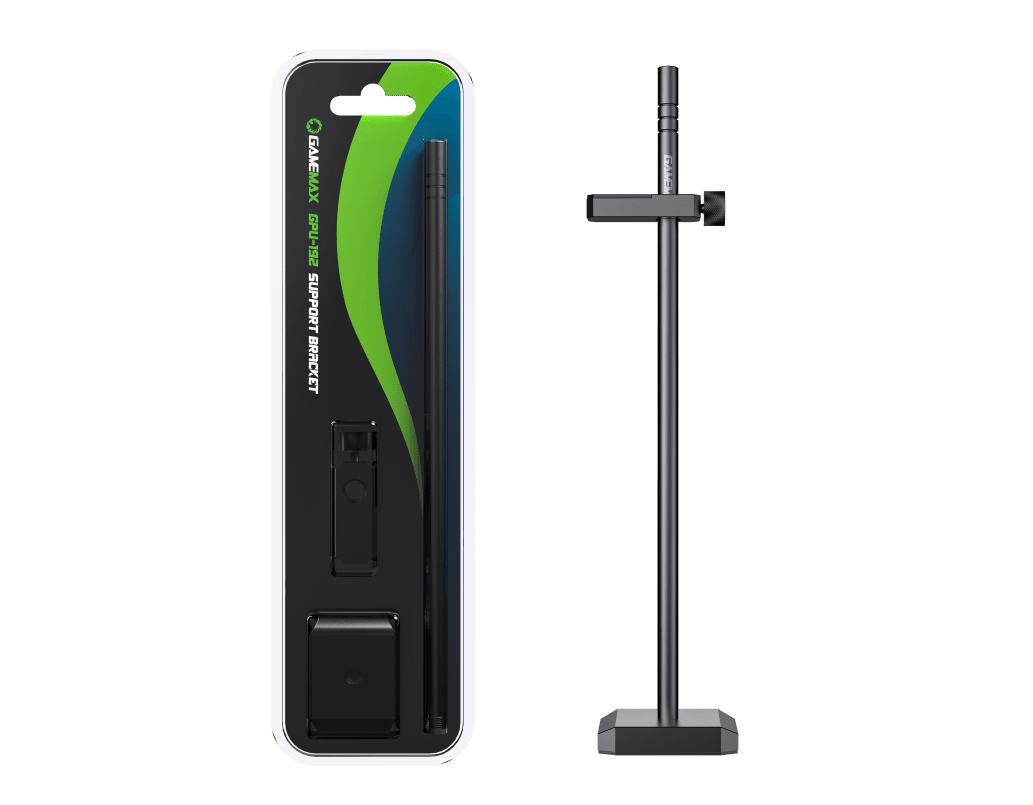
As the "foundation" of vertical installation, the support bracket’s stability directly impacts GPU safety. The GameMax GPU-192 BK stands out with three core advantages:
Premium Material: Ditching fragile plastic, it uses an aluminum-magnesium alloy body, treated with anodizing and sandblasting for a sleek, corrosion-resistant finish that lasts for years.
Adjustable Design: Features height-adjustable sliding to fit dual-slot and triple-slot GPUs, compatible with ATX, mATX, ITX cases, and long PSU chambers—no worries about case compatibility.
Thoughtful Details: A hidden magnetic base (CNC-machined for smooth edges) and a mesh rubber pad secure the bracket firmly while protecting the case’s interior from scratches, ensuring easy installation and hardware safety.
To move the GPU from the motherboard’s PCIe slot to the case’s side, a riser cable is essential. Opt for PCIe 4.0 or 5.0-compliant cables for stable signal transmission. Choose a length that matches your case (common sizes: 20cm–50cm) and prioritize models with EMI shielding to reduce interference.
Some cases natively support vertical installation with pre-built bracket slots. For non-compatible cases, purchase a vertical mounting bracket or mod kit, which typically includes metal brackets and screws. Ensure the kit matches your case’s side-panel holes to keep the GPU parallel and stable.
Cable Ties & Management Tools: Organize riser cables and power cables to maintain a tidy interior and prevent 晃动 (晃动 = 晃动) that could destabilize the GPU.
Anti-Slip Pads: Add silicone pads where the GPU contacts the bracket to increase friction and prevent vibration-induced shifts.
Plan the Layout: Mark the vertical GPU position, measure the required bracket height, and ensure it aligns with the GPU’s center of gravity.
Secure Step by Step: Install the PCIe riser cable first, fix the GPU, then adjust the bracket to keep it level.
Test Stability: Gently shake the GPU after installation to check for looseness; adjust the bracket or add anti-slip measures if needed.
Vertical GPU installation is more than a hardware upgrade—it’s a statement of PC customization. Choosing quality accessories is key, and the GameMax GPU-192 BK delivers with its metallic elegance, adjustability, and durability, providing reliable support for your GPU. Whether you’re a hardcore gamer chasing optimal cooling or a modding enthusiast focused on aesthetics, this solution elevates both the performance and style of your build.

