

Connecting a wireless mouse is a simple process, but paying attention to key details can ensure a stable and smooth connection. Below is a detailed guide, with critical steps and precautions highlighted to help you avoid common issues.
Before starting, confirm you have all the required items. Missing any of these will directly cause connection failures:
Wireless mouse: Check if it has a power switch (most do) and ensure it is turned off temporarily to save battery.
Batteries: Open the mouse’s battery compartment (usually on the bottom) and insert the correct type (AA or AAA) as specified in the user manual. Note the positive (+) and negative (-) polarities—incorrect installation will prevent the mouse from powering on.
USB receiver (for non-Bluetooth mice): Many wireless mice use a small USB receiver (often stored in the battery compartment or a slot on the mouse’s bottom). Keep it handy.
Computer/laptop: Ensure it is powered on and has an available USB port (for the receiver) or Bluetooth function (for Bluetooth mice).
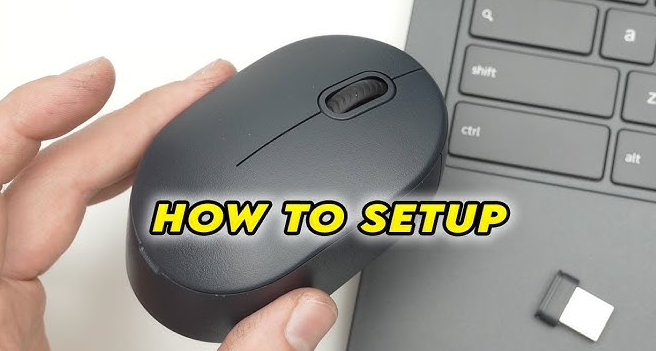
This method applies to mice that rely on a dedicated USB receiver (not Bluetooth). Follow these steps strictly:
Insert the USB receiver: Plug the receiver into an available USB port on your computer. For desktops, use a front USB port if possible (back ports may have weaker signals due to interference from other components). For laptops, avoid USB-C adapters if possible—direct insertion into a USB-A port is more stable.
Power on the mouse: Turn on the mouse’s power switch (usually labeled “On/Off” or indicated by a power icon). You may see a small LED light flash briefly, indicating it is trying to connect.
Wait for automatic pairing: Most modern mice use “plug-and-play” technology. The computer will detect the receiver within 10–30 seconds and install the necessary drivers automatically. You’ll see a notification like “Device is ready” when done.
Test the connection: Move the mouse—if the cursor responds smoothly on the screen, the connection is successful. If not, try reinserting the receiver into a different USB port (some ports may be faulty) or restarting the computer.
Bluetooth mice connect directly to your device without a receiver, making them ideal for laptops or tablets with limited USB ports. Bluetooth compatibility is key here:
Enable Bluetooth on your computer: On Windows, go to “Settings > Devices > Bluetooth & other devices” and toggle Bluetooth to “On”. On macOS, click the Bluetooth icon in the menu bar and select “Turn Bluetooth On”.
Set the mouse to pairing mode: Turn on the mouse, then press and hold the pairing button (usually on the bottom, marked with a Bluetooth logo) for 3–5 seconds. The LED light will start flashing continuously (e.g., blue or green) to indicate it is in pairing mode. Refer to the user manual if you can’t find the button—some mice enter pairing mode automatically when first turned on.
Pair on the computer: On your computer, go to the Bluetooth settings page. Click “Add Bluetooth or other device” (Windows) or “Set up a new device” (macOS). Select “Mouse” from the device list when it appears (it may be labeled with the mouse’s brand, e.g., “Logitech M325”).
Complete pairing: Follow the on-screen prompts (no password is usually required). Once paired, the mouse’s LED light will stay solid or turn off (to save battery), and the cursor will respond when you move the mouse.
If the mouse fails to connect, check these common issues first:
Battery problems: Replace the batteries with new ones—weak batteries are the top cause of intermittent or failed connections.
Receiver interference: Keep the mouse and receiver away from other wireless devices (e.g., routers, Bluetooth speakers) or metal objects, as they can block the 2.4GHz signal.
Driver issues: If the computer doesn’t detect the mouse, go to the mouse manufacturer’s official website (e.g., Logitech, Microsoft) and download the latest driver for your model. Install it and restart the computer.
Bluetooth conflicts: For Bluetooth mice, turn off other Bluetooth devices nearby (e.g., smartphones) to avoid signal conflicts. If the mouse was paired with another device before, forget it on that device first, then re-pair with your computer.
Keep the mouse close: Maintain a distance of no more than 3–5 meters between the mouse and the computer/receiver. Walls or metal barriers can weaken the signal.
Update drivers: Periodically check for driver updates via your computer’s device manager or the manufacturer’s software (e.g., Logitech Options) to fix bugs and improve responsiveness.
Turn off when not in use: If you won’t use the mouse for a long time, turn off its power switch to extend battery life.
By following these steps and focusing on the highlighted key points, you can connect your wireless mouse quickly and enjoy a reliable experience.

